평소 향로님 블로그를 자주 보는 편인데 Github에도 같은 내용이 커밋되어 올라오고 있었다.
나도 블로그에 쓴 글을 Github에도 올리고 싶어졌다. 잔디도 심고 Github에서도 내 글을 볼 수 있으니 접근성이 좋아지지 않을까하는 생각이었다.
하지만 같은 작업을 두 번 반복한다는 것이 너무 귀찮게 느껴졌고 Github에 업로드하는 것을 자동화하고자 했다.
프로세스를 요약하면 다음과 같다.
GithubActions 트리거 -> 블로그 크롤링 -> 게시글을 Markdown으로 변환 -> Github 레포지토리에 md 파일로 저장
1. RSS 설정
RSS는 업데이트가 자주 이루어지는 웹사이트의 정보를 사용자에게 보다 쉽게 제공하는 XML 포맷이다. 업데이트가 빠른 뉴스 또는 블로그를 RSS 구독해서 새로 업데이트된 정보나 알림을 받을 때도 사용된다.
티스토리도 https://given-dev.tistory.com/rss 같이 내 블로그의 RSS를 등록할 수 있다. velog에서 티스토리로 넘어온 이유 중 하나이기도 하다. 이를 통해 외부에 새로운 게시글 정보를 제공할 수 있게 된다.
구글 서치 콘솔을 사용할 때 RSS 주소를 제출하는 것도 이 때문이다.
블로그 관리 -> 관리 -> 블로그 -> 기타 설정에서 RSS를 전체 공개한다.
2. Python 코드 작성
2.1. 라이브러리 설치
RSS에 포함된 게시글은 HTML로 작성되어 있고 Github은 Markdown과 호환이 좋기 때문에 Markdown으로 변환할 것이다.
XML 포맷의 RSS를 딕셔너리로 파싱하는 feedparser와 HTML을 Markdown으로 변환하는 markdownify 라이브러리를 설치한다.
pip3 install feedparser && pip3 install markdownify2.2. 전체 코드
import feedparser
import os
import re
from markdownify import markdownify

BLOG_URI = "https://given-dev.tistory.com/"
GITHUB_URI = "https://github.com/GIVEN53/blog-post/tree/main/"


def update(feeds: list):
    for feed in feeds:
        category = feed["tags"][0]["term"]
        title = feed["title"]
        content = create_content(title, feed["summary"])

        file_name = get_file_name(category, title)
        with open(file_name, "w", encoding="utf-8") as f:
            f.write(content)
        update_readme(category)


def create_content(title: str, summary: str) -> str:
    contents = summary.split("<pre>")

    for i in range(len(contents)):
        code_block = re.search(r'<code\s+class="([^"]+)"', contents[i])
        if code_block:
            language = code_block.group(1)
            if "language-" in language:
                language = language.replace("language-", "")
            contents[i] = attach_language(language, "<pre>" + contents[i])
        else:
            contents[i] = markdownify(contents[i])
    return f"{title}\n=\n" + "".join(contents)


def attach_language(language: str, content: str) -> str:
    content = markdownify(content).split("```")
    return "\n```" + language + content[1] + "```\n" + "".join(content[2:])


def get_file_name(category: str, title: str) -> str:
    file_path = f"{category}/{title}/".replace(" ", "_")
    os.makedirs(file_path, exist_ok=True)
    return file_path + "README.md"


def update_readme(category: str):
    with open("README.md", "r", encoding="utf-8") as f:
        readme = f.read()

    if readme.find(category) == -1:
        with open("README.md", "a", encoding="utf-8") as f:
            f.write(f"\n- [{category}]({GITHUB_URI + category})")

    sort_toc()


def sort_toc():
    with open("README.md", "r", encoding="utf-8") as f:
        readme = f.read()

    start = readme.find("## 목차")
    toc = readme[start:].strip()
    toc_lines = sorted(toc.split("\n")[1:])
    sort_toc = "\n".join(["## 목차"] + toc_lines)

    with open("README.md", "w", encoding="utf-8") as f:
        f.write(readme.replace(toc, sort_toc))


if __name__ == "__main__":
    feeds = feedparser.parse(BLOG_URI + "rss")
    update(feeds["entries"])
2.2.1. RSS 파싱
if __name__ == "__main__":
    feeds = feedparser.parse(BLOG_URI + "rss")
    update(feeds["entries"])
메인부터 보면 RSS를 딕셔너리로 파싱한 후 entries라는 key로 update()를 호출한다.entries의 value는 RSS로 얻은 모든 게시글의 메타 데이터와 글 내용을 담고 있다.
2.2.2. 게시글 업데이트
def update(feeds: list):
    for feed in feeds:
        category = feed["tags"][0]["term"]
        title = feed["title"]
        content = create_content(title, feed["summary"])

        file_name = get_file_name(category, title)
        with open(file_name, "w", encoding="utf-8") as f:
            f.write(content)
        update_readme(category)
각 게시글을 순회하면서 카테고리, 제목, 내용을 추출해서 파일을 작성한다.
2.2.3. Markdown 변환
def create_content(title: str, summary: str) -> str:
    contents = summary.split("<pre>") # (1)

    for i in range(len(contents)):
        code_block = re.search(r'<code\s+class="([^"]+)"', contents[i]) # (2)
        if code_block:
            language = code_block.group(1)
            if "language-" in language: # (3)
                language = language.replace("language-", "")
            contents[i] = attach_language(language, "<pre>" + contents[i])
        else:
            contents[i] = markdownify(contents[i])
    return f"{title}\n=\n" + "".join(contents)
HTML을 그대로 Markdown으로 변환하면 코드블럭에서 선언한 프로그래밍 언어가 사라져서 문법 강조를 사용할 수 없다.
따라서 문법 강조를 사용할 수 있게 프로그래밍 언어를 추출하는 과정을 거친다.
- (1) HTML의 코드블럭은
<pre><code>...</code></pre>이므로<pre>를 기준으로 split한다. - (2) 티스토리는 선언한 프로그래밍 언어를
<code>태그의 class 속성에 정의하고 있기 때문에 정규식으로 해당 부분을 찾는다.
- (3) 티스토리는 언어에 항상
language-prefix가 따라붙는다. Markdown에서는 인식하지 못하기 때문에 제거한다.티스토리의 코드블럭은 highlight.js에 있는 언어를 지원하지만 일반적으로 많이 사용하지 않는 언어를 사용하면 업로드했을 때
language-때문에 코드블럭이 깨진다.
terraform의 aliastf를 사용했을 때resource "aws_ecs_cluster" "cluster" { name = var.cluster_name dynamic "service_connect_defaults" { for_each = var.namespace_arn != null ? [1] : [] content { namespace = var.namespace_arn } } }HTML 모드로 바꿔서
language-를 제거하고 업로드하면 정상적으로 나타난다.resource "aws_ecs_cluster" "cluster" { name = var.cluster_name dynamic "service_connect_defaults" { for_each = var.namespace_arn != null ? [1] : [] content { namespace = var.namespace_arn } } }이처럼
language-prefix가 없는 코드블럭도 존재하기 때문에 한 번 더 분기 처리한다.
2.2.4. 문법 강조를 위한 언어 선언
def attach_language(language: str, content: str) -> str:
    content = markdownify(content).split("```")
    return "\n```" + language + content[1] + "```\n" + "".join(content[2:])
코드블럭을 Markdown으로 변환하면```...```이 된다. 추출한 언어를 추가해서 ```python ...```으로 만들어준다.
2.2.5. 파일을 작성할 디렉토리 생성
def get_file_name(category: str, title: str) -> str:
    file_path = f"{category}/{title}/".replace(" ", "_")
    os.makedirs(file_path, exist_ok=True)
return file_path + "README.md"카테고리/제목/의 디렉토리를 생성하고 카테고리/제목/README.md 파일명을 리턴한다. 이 파일에 게시글 내용이 작성된다.
2.2.6. README에 목차 생성
def update_readme(category: str):
    with open("README.md", "r", encoding="utf-8") as f:
        readme = f.read()

    if readme.find(category) == -1:
        with open("README.md", "a", encoding="utf-8") as f:
            f.write(f"\n- [{category}]({GITHUB_URI + category})")

    sort_toc()
Github 레포지토리의 루트에 있는 README.md에 카테고리로 목차를 생성한다.
2.2.7. 목차 정렬
def sort_toc():
    with open("README.md", "r", encoding="utf-8") as f:
        readme = f.read()

    start = readme.find("## 목차")
    toc = readme[start:].strip()
    toc_lines = sorted(toc.split("\n")[1:])
    sort_toc = "\n".join(["## 목차"] + toc_lines)

    with open("README.md", "w", encoding="utf-8") as f:
        f.write(readme.replace(toc, sort_toc))
추가할 목차는 README.md에 마지막 라인부터 이어서 써지기 때문에 목차를 사전편찬 순으로 정렬한다.
3. GithubActions
name : Posts Updater

on:
  push:
    branches: [ main ]
  schedule:
    - cron: "0 0 */1 * *" # (1)

jobs:
  build:
    runs-on: ubuntu-latest
    steps:
    - name: Checkout
      uses: actions/checkout@v3

    - name: Set up Python 3.9
      uses: actions/setup-python@v3
      with:
        python-version: '3.9'

    - name: Install dependencies # (2)
      run: |
        python3 -m pip install --upgrade pip
        pip3 install feedparser
        pip3 install markdownify

    - name: Update posts # (3)
      run: |
        python3 posts-update-automation.py

    - name: Commit and push when there are changes # (4)
      run: |
        git add .
        if [ -n "$(git status --porcelain)" ]; then
          git config --local user.email "${{ secrets.EMAIL }}"
          git config --local user.name "Nam Gi Beom"
          git commit -m "Update posts via workflow-${{ github.run_number }}"
          git push
fi- (1) cron을 사용하여 매일 workflow를 실행한다. GitHub Docs에서 스케줄링에 필요한 cron 표현식을 확인할 수 있다.
- (2) python 파일에 필요한 라이브러리를 설치한다.
- (3) python 파일을 실행한다.
- (4) 변경 사항이 있을 때 commit, push한다.

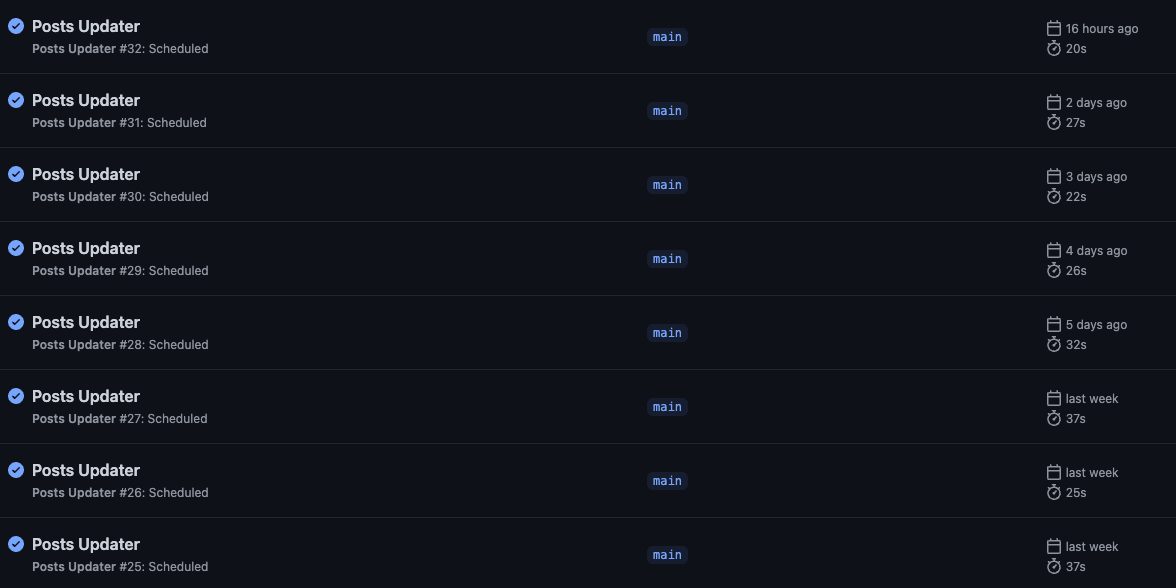
매일 UTC기준 00:00 ~ 01:00 사이에 실행되고 새로 업로드된 게시글을 md 파일로 저장한다.
결과와 전체 코드는 Github에서 확인할 수 있다.
자동화는 언제나 즐겁다!